


Hey there! If you're looking to spruce up your space with a touch of elegance, installing matt marble tile is a fantastic choice. As a supplier of high - quality matt marble tiles, I'm here to walk you through the installation process step by step.
1. Preparation
Before you start laying those beautiful tiles, you've got to get everything ready. First off, measure the area where you'll be installing the tiles. This helps you figure out how many tiles you need. You don't want to run out in the middle of the project, right?
Gather all the tools you'll need. You'll need a tile cutter, which can be either a manual or an electric one depending on your preference and the type of tile. A notched trowel is essential for spreading the tile adhesive evenly. You'll also need a level to make sure your tiles are flat and straight, a rubber mallet to tap the tiles into place, and a grout float for applying the grout later.
2. Choosing the Right Tile
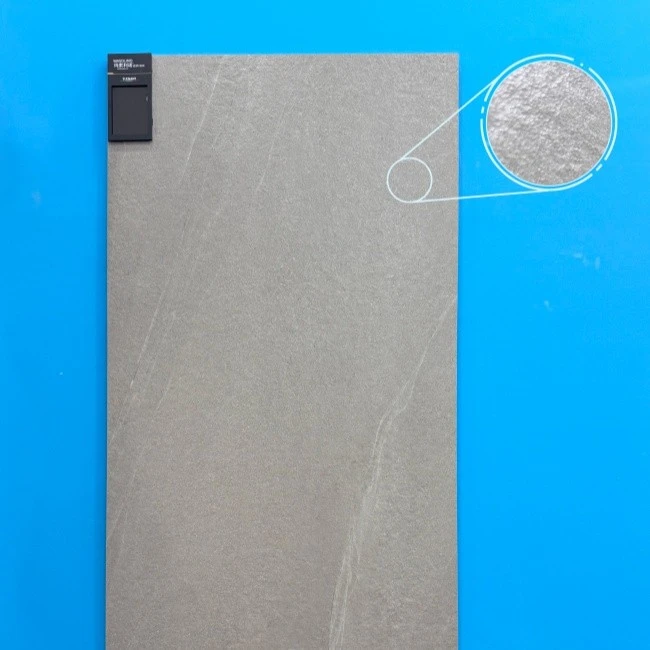
We offer a variety of matt marble tiles, like the Black Sandstone Tile and the Grey Sandstone Tile. These tiles have a unique texture and color that can add a modern and sophisticated look to any room. If you're more into a porcelain option, our Grey Marble Porcelain Tile is a great choice. It combines the look of marble with the durability of porcelain.
3. Surface Preparation
The surface where you're going to install the tiles needs to be clean, dry, and level. If it's a floor, remove any old flooring, dirt, or debris. Use a floor scraper or a vacuum cleaner to get rid of all the junk. If there are any cracks or uneven areas, fill them with a floor leveling compound. Let it dry completely according to the manufacturer's instructions.
For walls, make sure the wall is free of paint, wallpaper, or any other coatings. You can use a wall sander to smooth out the surface if needed.
4. Layout Planning
Laying out the tiles before actually installing them is a smart move. Start by finding the center of the room. You can do this by measuring the length and width of the room and marking the center points. Then, snap a chalk line across the room at the center. This will be your guide for laying the first row of tiles.
Arrange the tiles on the floor or wall according to your design. You can choose different patterns like a grid, herringbone, or diagonal. This gives you a chance to see how the tiles will look and make any adjustments before you start gluing them down.
5. Applying the Adhesive
Now it's time to apply the tile adhesive. Pour a small amount of adhesive on the surface using a trowel. Use the notched side of the trowel to spread the adhesive evenly, creating ridges. Make sure the ridges are uniform and about the right size for your tiles.
Work in small sections so that the adhesive doesn't dry out before you can lay the tiles. The size of the section depends on how quickly you can lay the tiles. Usually, a 3 - 4 square feet section is a good start.

6. Laying the Tiles
Take a tile and place it on the adhesive, pressing it down firmly. Use a rubber mallet to tap the tile gently until it's level with the surrounding tiles. Make sure there are small gaps between the tiles for the grout. You can use tile spacers to keep the gaps consistent.
Continue laying the tiles row by row, following your layout plan. If you need to cut a tile to fit an edge or a corner, use your tile cutter. Measure the tile accurately and score it with the cutter. Then, break the tile along the scored line.
7. Grouting
Once all the tiles are laid and the adhesive has dried (usually after 24 - 48 hours), it's time to grout. Mix the grout according to the manufacturer's instructions. Use a grout float to spread the grout over the tiles, filling the gaps.
Work the grout into the gaps at a 45 - degree angle, making sure all the gaps are completely filled. Remove the excess grout with the edge of the float. Let the grout dry for a few minutes, then use a damp sponge to wipe the surface of the tiles clean.
8. Sealing
After the grout has dried completely (usually after 2 - 3 days), it's a good idea to seal the tiles and the grout. Sealing helps protect the tiles from stains and moisture. You can use a tile sealer that's suitable for matt marble tiles. Apply the sealer according to the manufacturer's instructions, using a brush or a roller.
9. Maintenance
Once your matt marble tiles are installed, they're relatively easy to maintain. Clean them regularly with a mild detergent and a soft cloth. Avoid using abrasive cleaners or scrubbers as they can scratch the surface of the tiles.
If you spill something on the tiles, clean it up right away. Some substances like acidic liquids can damage the marble, so it's important to be careful.
Contact Us for Your Tile Needs
If you're interested in purchasing our high - quality matt marble tiles, whether it's the Black Sandstone Tile, Grey Sandstone Tile, or Grey Marble Porcelain Tile, don't hesitate to reach out. We're here to help you with your tile project and offer the best advice and support.
References
- Tile Installation Guidebooks from Tile Manufacturers
- DIY Home Improvement Magazines


